Talk:Region Growing Segmentation
(Created page with "'''Region Growing Segementation with Saga's Seeded Region Growing Tool''' The following tutorial explains how to delineate tree crowns, using SAGA's Seeded Region Growing Too...") |
|||
| Line 16: | Line 16: | ||
QGIS 2.18.11 | QGIS 2.18.11 | ||
| + | |||
SAGA 2.3.2 | SAGA 2.3.2 | ||
| − | |||
| − | |||
| − | + | '''Seed points''' | |
| + | The first step here is to extract the position of the tree tops, which are going to be the starting point for the region growing algorithm. You find a descritpion how to derive the seed points from a CHM [[Individual_Tree_Detection_(ITC)|here]] . | ||
Now have a look at how the seeds align with your surface picture (orthophoto or else): | Now have a look at how the seeds align with your surface picture (orthophoto or else): | ||
| − | [[ | + | [[File:Unfiltered_seed_points.PNG]] |
| − | + | ||
In this picture you see, that the points align well with the tree tops, but there are many points that represent small trees in the lower left corner which you might not be so interested in. In order to correct that, we are going to filter the points by their height in the seed shapefile and save the shapefile with the selected seeds only (save as....) | In this picture you see, that the points align well with the tree tops, but there are many points that represent small trees in the lower left corner which you might not be so interested in. In order to correct that, we are going to filter the points by their height in the seed shapefile and save the shapefile with the selected seeds only (save as....) | ||
| + | |||
This looks much better: | This looks much better: | ||
| − | [[ | + | |
| − | [[File: | + | [[File:Filtered_seed_points.PNG]] |
| + | |||
| + | |||
| + | |||
| + | '''Seed point rasterization''' | ||
| + | |||
| + | In order to use the seed points in the region growing algorithm in SAGA, we have to convert the vector file to a raster file using the Rasterize function in QGIS. What is critical, is that we create a reaster file that only contains the seed points and no-data. | ||
| + | |||
| + | In order to achieve this we are going to use the following settings: | ||
| + | |||
| + | [[File:Rasterize.PNG]] | ||
| + | |||
| + | Make sure that the output resolution has the exact same size as the orthophoto that you are using. Best is to copy from the properties of the raster. Choose the xtend by selecting the orthophotos extend. Nodata value should be set to 0. | ||
| + | Next, check the properties of the newly created raster layer and load the min/max values in the styles menu. | ||
| + | |||
| + | The result should look like the universe: | ||
| + | |||
| + | [[File:Universe.PNG]] | ||
| + | |||
| + | |||
| + | |||
| + | Next steps: | ||
| + | |||
| + | Translate seed raster to set all pixels to no-data that are not seeds.... | ||
| + | |||
| + | Next: Split stack with translate picture files | ||
| + | |||
| + | next: superimpose extend and origin | ||
| + | |||
| + | Check everything: pixels should align 100% | ||
| + | |||
| + | |||
| + | Next saga: growing regions algorithm | ||
| + | |||
| + | Basis of algorithm citation | ||
| + | settings | ||
| + | export with vectorize | ||
| + | adjust | ||
| + | enjoy | ||
Revision as of 13:34, 6 April 2018
Region Growing Segementation with Saga's Seeded Region Growing Tool
The following tutorial explains how to delineate tree crowns, using SAGA's Seeded Region Growing Tool. The product, a polygon shapefile, can then be used in an object based classification, f.ex. in order to classify different tree species.
Material you need to complete the tutorial:
Data
An orthophoto, or a satellite image (preferably with different spectral bands) A canopy height model CHM
Software
QGIS 2.18.11
SAGA 2.3.2
Seed points
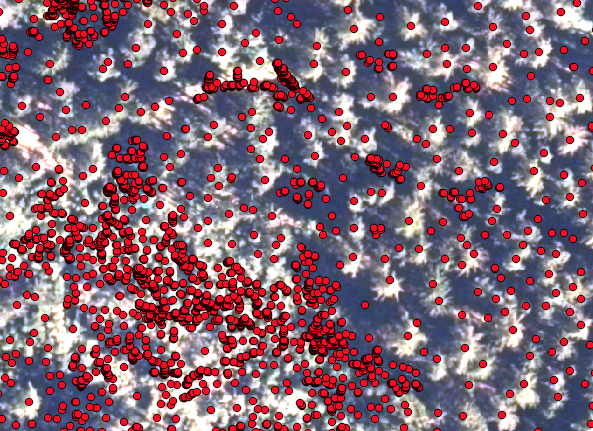
The first step here is to extract the position of the tree tops, which are going to be the starting point for the region growing algorithm. You find a descritpion how to derive the seed points from a CHM here . Now have a look at how the seeds align with your surface picture (orthophoto or else):
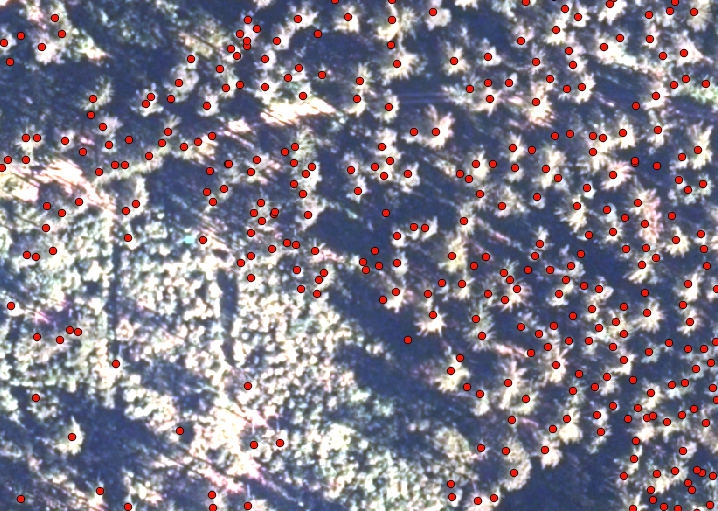
In this picture you see, that the points align well with the tree tops, but there are many points that represent small trees in the lower left corner which you might not be so interested in. In order to correct that, we are going to filter the points by their height in the seed shapefile and save the shapefile with the selected seeds only (save as....)
This looks much better:
Seed point rasterization
In order to use the seed points in the region growing algorithm in SAGA, we have to convert the vector file to a raster file using the Rasterize function in QGIS. What is critical, is that we create a reaster file that only contains the seed points and no-data.
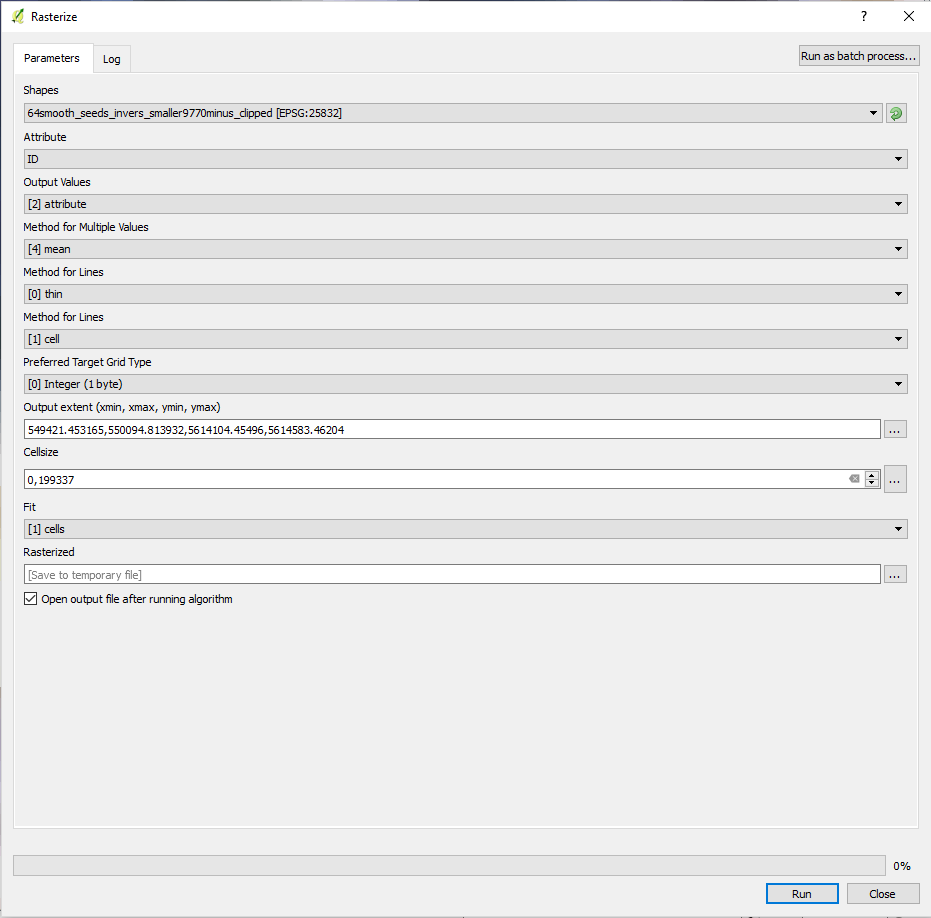
In order to achieve this we are going to use the following settings:
Make sure that the output resolution has the exact same size as the orthophoto that you are using. Best is to copy from the properties of the raster. Choose the xtend by selecting the orthophotos extend. Nodata value should be set to 0. Next, check the properties of the newly created raster layer and load the min/max values in the styles menu.
The result should look like the universe:
Next steps:
Translate seed raster to set all pixels to no-data that are not seeds....
Next: Split stack with translate picture files
next: superimpose extend and origin
Check everything: pixels should align 100%
Next saga: growing regions algorithm
Basis of algorithm citation settings export with vectorize adjust enjoy


