Creating GPS waypoints
From AWF-Wiki
(Difference between revisions)
| Line 18: | Line 18: | ||
#* Click {{button|text=OK}} | #* Click {{button|text=OK}} | ||
# Now the waypoints are uploaded to the GPS device. | # Now the waypoints are uploaded to the GPS device. | ||
| + | |||
| + | ==Related articles== | ||
| + | * [[Defining an own custom Spatial Reference System (SRS)]] | ||
| + | * [[Outdoors with the GPS receiver]] | ||
| + | * [[Using the GPS Tracking Plugin]] | ||
| + | * [[Download from GPS receiver]] | ||
| + | * [[Digital photo links with the eVIS plugin]] | ||
[[Category:Overview on GPS applications|2]] | [[Category:Overview on GPS applications|2]] | ||
Revision as of 12:11, 9 December 2010
QGIS Tutorial
Category QGIS tutorial not found
- Load the aerial photo goe_uninord_ref.tif
- Load the topographical map dgk5.tif
- Set the projection of both rasters to custom “SRS Gauss Kruger Zone 3 Middle-West ger” Layer properties → General → Change SRS
- Create a new gpx layer
- Click Plugins → GPS → Create new gpx layer Save file as goegps. Three layers will be added.
- Activate the layers goegps and waypoints
- Start editing: Click the button
 in the digitizing toolbar.
- To capture a point click the button
 and mark a point on the map or the aerial photo.
- Stop editing: click the button in the digitizing toolbar- your points will be saved.
- Upload to the GPS device
- Connect your GPS device with the computer
- Click Plugins → GPS → GPS tools
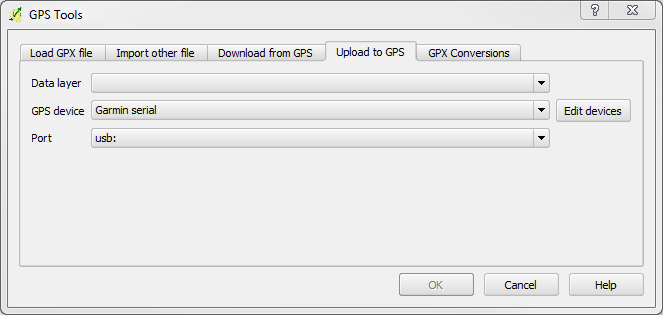
- Click Upload to GPS
- Choose your data layer goegps, waypoint
- Set the port to “com1” or “USB”
- Click OK
- Now the waypoints are uploaded to the GPS device.
