Using the GPS Tracking Plugin
Currently the GPS Tracker plugin only works on Windows platforms. Make sure you
have GPSbabel installed (OSGeo4W Installation). The GPS Tracking Plugin allows to
use a GPS device that is emitting NMEA messages and that is connected to a serial port
to display the current position on the QGIS map canvas and to show the route on the
map canvas that is traced by the moving GPS receiver. The map canvas is continuously
centered on the GPS position. The user may choose to save the recorded positions to
points and/or lines Shape files if this option is selected.
Set your GPS receiver to NMEA output for your serial line. In the Setup Menu of Garmin Receivers go to “Set Interface Page” from different input/output serial data formats (I/O FORMAT) for connecting external standard NMEA 0183 devices. Connect the GPS output line to a serial port (Com port) on your computer. If your computer does not have a serial com port you can also use a serial cabel with a usb to serial port converter.
There is also the need to configure the Com port under Windows XP. Under Settings Control panel Hardware Device Manager Open the “Ports (COM&LPT)” and with a right mouse click | Properties Port Settings set the “Bits per second” (Baudrate) to 4800.
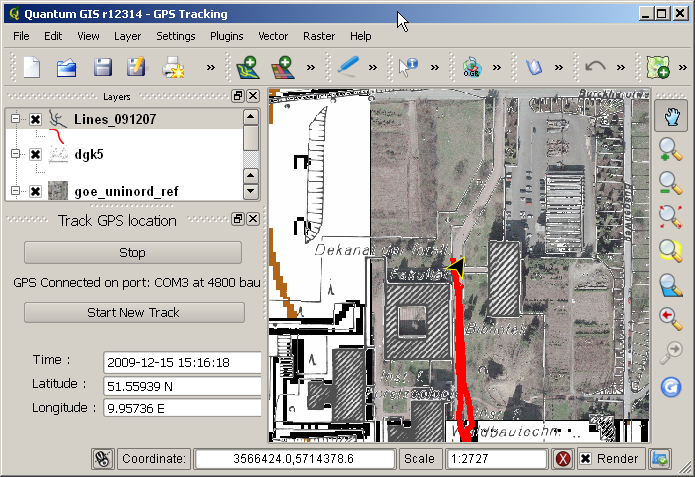
You are now ready to activate the plugin in the plugin manager. Start the connection by clicking on the Start button. Switch on the GPS Receiver and wait for the message “GPS Connected on port: COM at 4800 baudrate”. This can take a few minutes the first time you start the Tracking. If the GPS unit receives signals from at least three satellites registering of the track starts. The position marker shows your present location in the QGIS map canvas and shows your travel as a red line.
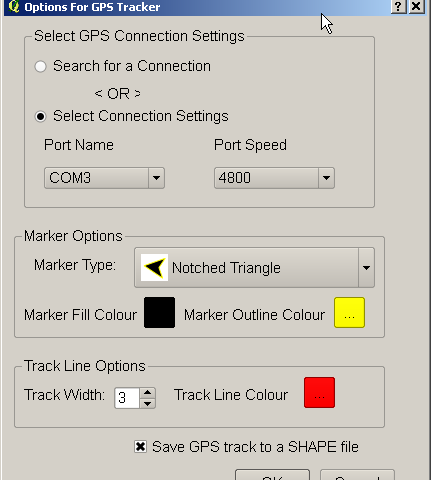
The tracking options can be set by selecting the menu item from the GPS Tracker Plugin menu or by starting a new track as mentioned in the previous section. The track dialog window appears as follows:
There is also an option to save the data to Shape files, after you select this option and you stop the recording of GPS positions then you will be prompted for the type of Shape files to create (points or lines or both) and their names and locations. Once you have selected these options the plugin will save the track points to the selected files.

