Point sampling on raster
From AWF-Wiki
First phase: systematic sampling
- Click Plugins --> Manage and Install Plugins.
- Type in the search bar Point sampling tool, click on the plugin name and then on Install plugin.
- Load the single band raster file C_ID.tif created by Convert vector to raster.
- Load the regular grid as vector point file systematic_grid100.shp' created by Creating regular grid.
- Make sure that both layers are ticked in the [TOC].
- Open the Point Sampling Tool clicking
 .
.
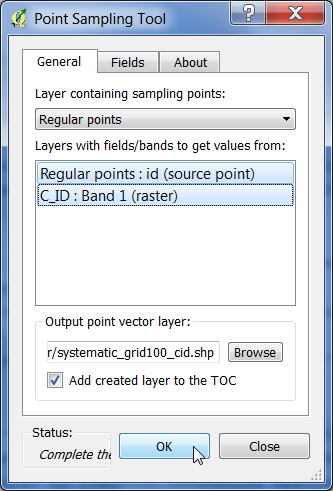
- Select the layer containing sampling points.
- Specify the output of the resulting vector file marking column with CTRL + left click.
- Enter an output shapefile name systematic_grid100_cid.shp and path by clicking Browse.
- Confirm with OK. The new layer is added to the Layer Panel .
Second phase: stratified sampling with equal allocation
- In the search engine of the Processing Toolbox, type Random selection and select Random selection within subsets under Vector selection tools of QGIS.
- Select the regular point grid (result of Creating regular grid) as the input layer.
- Select the Column name containing the grouping class code as ID field.
- Enter 10 as sample size for each category.
- Click Run to execute the algorithm.
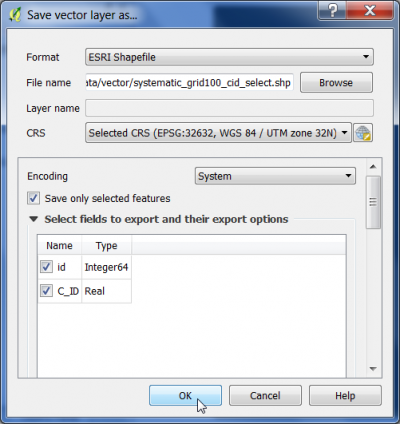
- Mark the the regular point grid in the TOC. Right click, Save as....
- Format of the output vector file is ESRI Shapefile
- Do not forget to tick Save only selected features.
- Define directory and output file name.
- Click Run to save the file.

