Supervised classification (Tutorial)
From AWF-Wiki
| sorry: |
This section is still under construction! This article was last modified on 02/18/2014. If you have comments please use the Discussion page or contribute to the article! |
- This article is part of the QGIS tutorial 2013/14.
In this article, you will learn how to conduct a supervised image classification in QGIS 2.0
- First, you need to install the Semi Automatic Class Plugin
- Click Manage and install plugins.
- In the appearing menu, select Add more.
- Browse for the plugin (it's most comfortable to use the search-field).
- Click Install
- Testing the plugin
- For the plugin to work, you need to make sure that your GRASS GIS installation is working properly:
- With the plugin installed, select Raster --> Semi Automatic Class Plugin.
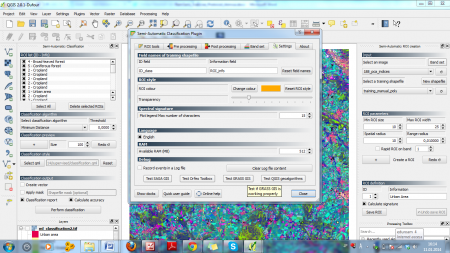
- In the appearing menu, select the Settings tab (figure A). Click Test Grass GIS and wait until the message Test OK appears.
- Click the Test QGIS Algorithm button and wait again until the Test OK message appears.
- Do the same for the Orfeo Toolbox and Saga algorithms.
- Classification
- Add the raster map 188_pca_indices.tif from the course data (see previous exercises).
- Also add the vector layer Training_manual_poly.shp.
- In the Semi Automatic Class Plugin, go to the Semi Automatic ROI Creation tab.
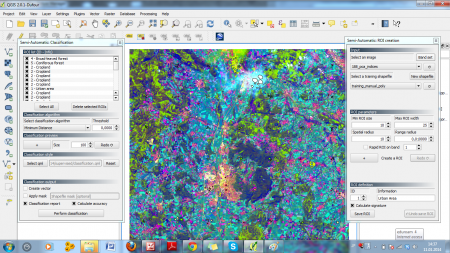
- In the ROI Definition section select ID: 1 and for Information enter Urban area and click + to add a ROI (figure B). Not sure about this... - Levent (talk)
- In the Classification algorithm section, choose Minimum distance. Click + in the Classification preview section.
- For Classification style click Select qml and browse for the file classification.qml from the course data. Click + to confirm and select any part of the image. A message will appear that the algorithm is executing. Wait until it has finished.
- In the Classification output section, check the Classificatin report and Calculate accuracy boxes.
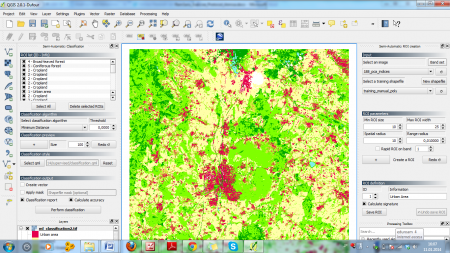
- Click Perform classification. Enter name and path for the output map (e.g. ml_classification.tif) and wait for the classification to finish (figure C).
- Trying alternative algorithms
- To get an impression of results depending on the alorithm selected, try the Maximum likelihood classifier as Classification algorithm.
- Assessing classification accuracy: the error matrix
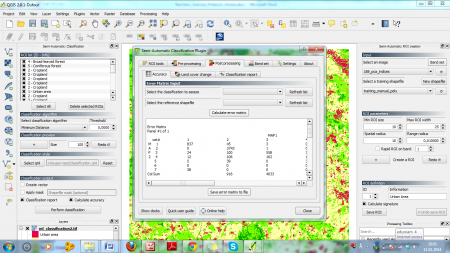
- In the Semi Automatic classification dialogue (figure D), select the Post processing tab to view the error matrix. If desired, it can be saved for future reference.


