Georeferencing (Tutorial)
From AWF-Wiki
| sorry: |
This section is still under construction! This article was last modified on 12/10/2013. If you have comments please use the Discussion page or contribute to the article! |
- This article is part of the QGIS tutorial 2013/14.
In this article you learn how to georeference a raster image.
- First, you need an image, e.g. an aerial photograph, that lacks spatial information. For exercise purposes, you can generate one from the Course data by opening the file aerial_utm_32_WGS84.tif from the geodata/raster/aerial/ folder with an image processing program (e.g. Irfanview under Windows). Simply save the file under a different name, e.g. image_raw.tif and open it in QGIS. QGIS will issue a warning that the layer lacks spatial information, prompting you to select a coordinate system. You can pick one ad libitum, e.g. WGS84 (EPSG:4326) or Gauss-Kruger zone 3 (EPSG:31467), and confirm with OK.
- If you look at the coordinates under Coordinate below the canvas you will recognize that the coordinates are far off the real position of the map. The top left corner of the image is located at the coordinate systems point of origin (thus 0,0), which you can see by simply positioning the mouse cursor at the corner.
- Open Raster --> Georeferencer --> Georeferencer (figure A). If the georeferencer is not available, you'll have to activate it first. Just open Plugins --> Manage and install plugins and type georeferencer into the search bar. Check the box Georeferencer GDAL and close the window. The plugin should now be available.
- In the georeferencer dialogue, click the Add raster
 icon. Browse for the image and click through the CRS-warning dialogue as described above.
- Now you have to add some ground control points (GCP's)!
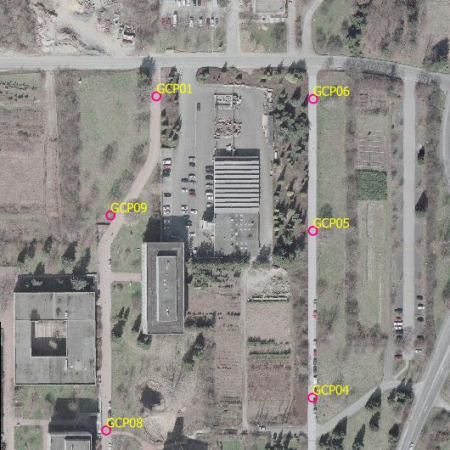
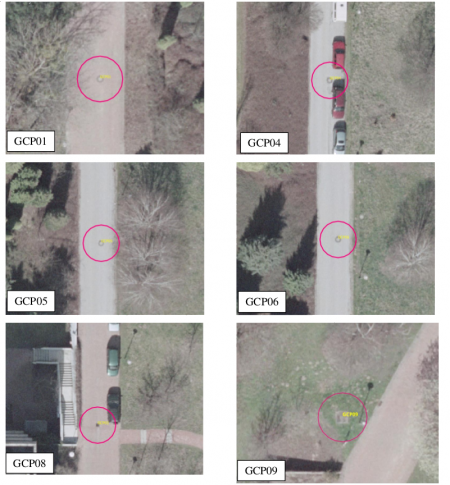
- Find the ground control points displayed in the figures below. The points are located at manholes (figures B and C, so that they can be relocated with a certain precision.
- Decide for one arbitrary point to start with, and zoom in on it using the zoom tool
 .
.
- When you have located the right spot, add a GCP using the Add point tool
 .
.
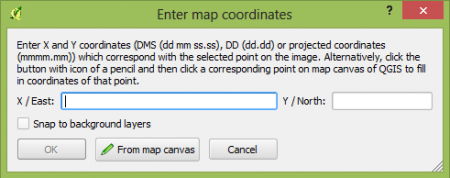
- A menu will pop up (figure D), prompting you for the GCP coordinates. Simply copy and paste the coordinates from the table below.
- Repeat this routine for all points. When you're done, open the Settings --> Transformation settings menu and configure the settings as follows:
- As Transformation type select Helmert.
- Enter name and directory for the output file, e.g. <my_geodata_folder>/aerial_georef.tif
- As Target SRS (Spatial reference system), choose the WGS84/UTM zone 32N (EPSG: 32632), as this is the coordinate system used for GPS data.
- Finally, click the Start georeferencing button
 .
.
- Add the resulting layer to the canvas and zoom in on it
 .
.
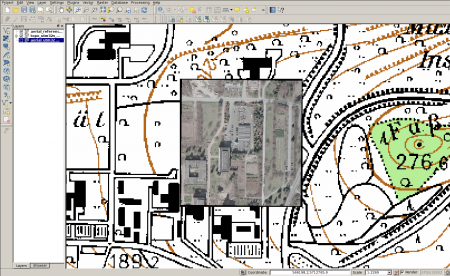
- You can check the quality of the georeferenciation by comparing the georeferenced map to the actual aerial_utm_32_WGS84.tif you loaded in the beginning. You can also load the topographic map topo_utm32_WGS84.tif from the geodata/raster/thematic/ directory as a reference (figure E).
- To reduce the overall transformation error, you may experiment with different transformation algorithms, which can be selected in the Settings --> Transformation settings Transformation type menu (see above).
GCP No. Easting Northing Height 01 566399.97 5712572.95 225.07 04 566491.76 5712396.51 232.50 05 566490.18 5712492.46 224.70 06 566489.27 5712570.51 222.00 08 566369.05 5712371.58 214.59 09 566370.13 5712508.13 217.87
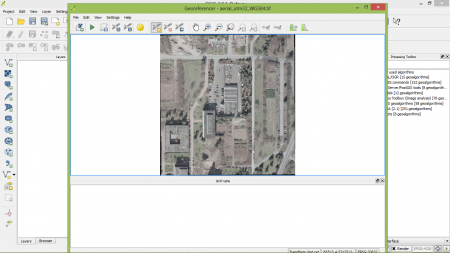 Figure A: QGIS 2.0 with open georeferencing dialogue. |
