Preprocessing Sentinel-2 with SNAP
From AWF-Wiki
(Difference between revisions)
(→Write to permanent file) |
(→Subsetting) |
||
| Line 17: | Line 17: | ||
=Subsetting= | =Subsetting= | ||
| − | + | '''Spatial subset''' | |
| − | + | * Mark the file name of the resampled product from previous work step in '''Product Explorer'''. | |
| − | + | * {{mitem|text=Raster --> Subset..}} | |
| − | * | + | * Left click in the preview of the Specify product subset dialog. |
| − | + | * In the ''Spatial Subset'' tab draw a box on top of the preview image and move it to your region of interest. | |
| − | + | * Make a note of pixel coordinates and (Geographical) geo coordinates if you want to repeat this step with other acquisiton dates of the same tile. | |
[[File:snap_specify_subset.png|400px]] | [[File:snap_specify_subset.png|400px]] | ||
| − | + | '''Spectral subset''' | |
| − | + | * In Band Subset tab click '''Select none''' and then check only the multispectral Reflectance Bands (B2,B3,B4,B5,B6,B7,B8,B8A,B11,B12). {{button|text=OK}}. | |
[[File:snap_specify_band_subset.png|400px]] | [[File:snap_specify_band_subset.png|400px]] | ||
Revision as of 09:37, 28 October 2019
Contents |
Reading a Sentinel-2 tile
- Download a complete Sentinel-2 tile from ESA Open Access Hub (see Downloading Sentinel-2 images).
- Start SNAP Desktop
- File --> Open Product...) Browse to the compressed Sentinel-2 zip file. Open or drag and drop the zip file from Windows File Explorer into the SNAP Product Explorer tab.
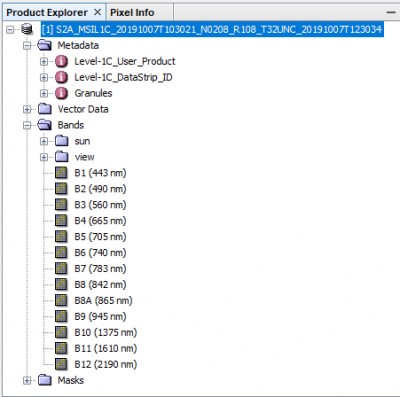
- Click on the plus sign of the file name in Product Explorer. Unfold Metadata and Bands.
Displaying a Sentinel-2 tile
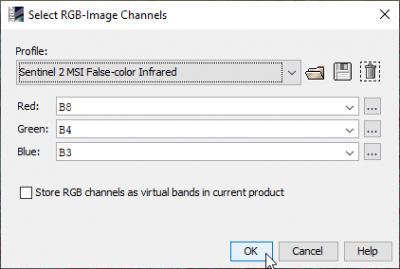
- Mark the file name in the Product Explorer. Right click Open RGB Image Window). In the Profile drop-down list select Sentinel 2 MSI False Colour Infrared. OK
Resampling
The spatial resolution of all satellite bands should be resampled to a unique pixel size (10m) to simplify the processing workflow.
- Raster --> Geometric Operations --> Resampling. Open the Resampling Parameters tab. Define size of resampled product: check by reference band from source product. Select B2 from drop down list. Run.
Subsetting
Spatial subset
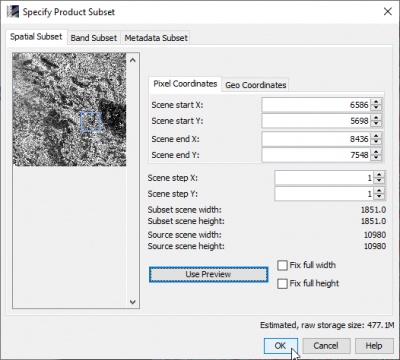
- Mark the file name of the resampled product from previous work step in Product Explorer.
- Raster --> Subset..
- Left click in the preview of the Specify product subset dialog.
- In the Spatial Subset tab draw a box on top of the preview image and move it to your region of interest.
- Make a note of pixel coordinates and (Geographical) geo coordinates if you want to repeat this step with other acquisiton dates of the same tile.
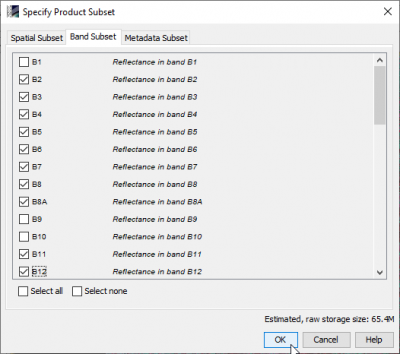
Spectral subset
- In Band Subset tab click Select none and then check only the multispectral Reflectance Bands (B2,B3,B4,B5,B6,B7,B8,B8A,B11,B12). OK.
Write to permanent file
Mark the subset file name in Product Explorer. File --> Export --> GeoTIFF. Click Export Product.


