Load a WMS-Layer
From AWF-Wiki
(Difference between revisions)
| Line 1: | Line 1: | ||
| + | {{TutorialNavigator}} | ||
{{Content Tree|HEADER=QGIS Tutorial|NAME=QGIS tutorial}} | {{Content Tree|HEADER=QGIS Tutorial|NAME=QGIS tutorial}} | ||
Revision as of 13:43, 21 February 2011
QGIS Tutorial
Category QGIS tutorial not found
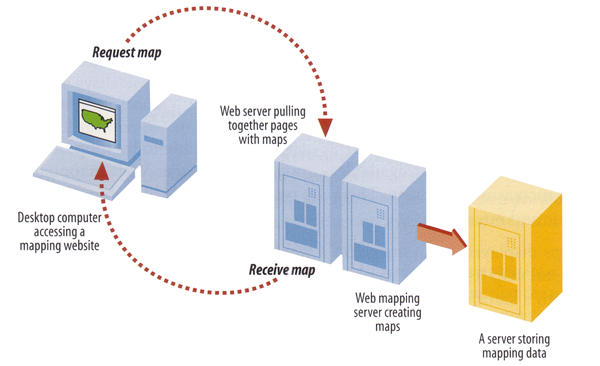
WMS stands for Web Map Service. WMS produces maps of spatially referenced data dynamically from geographic information. These maps are rendered in a pictorial format for example PNG, GIF or JPEG. The operations can be done using a standard web browser which submitt requests in form of a URL. The OGC WMS specification standardizes the way in which maps are requested by clients and the way that servers describe their data holdings.
Contents |
Clients
A growing number of clients supporting WMS or WFS standards.
- ArcGIS
- Quantum GIS
- UDIG
- OpenLayes - pure javascript library for displying map data in most web browsers
Requests
There are differnt types of requests, but only two are required by any wms server:
- GetCapabilities - returns parameters about the WMS and the available layers
- GetMap - with parameters provided, returns a map image
Add WMS layer
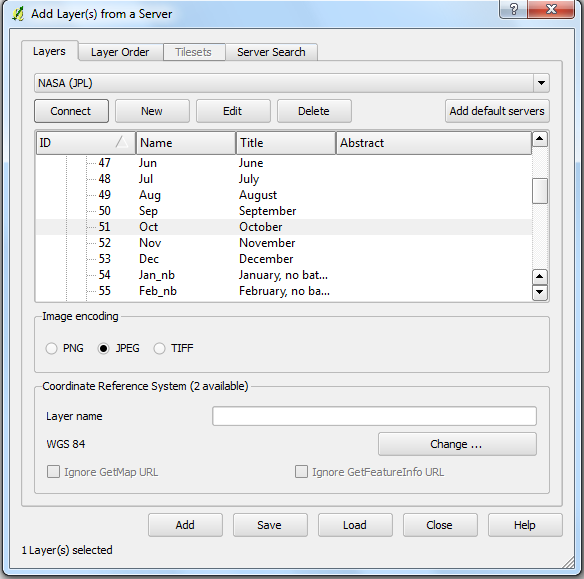
If you want to integrate a WMS-Layer to Quantum GIS you have to do the follwing steps.
- Click the Add WMS layer icon

- Click Add default servers.
- Select Nasa (JPL) as the Server connection from the drop-down list.
- Click Connect
- Now a list of all downloadable layers appears.
- Click on the layer to select him. If you click on the little Plus symbol you see all styles the layer included.
- After selecting the layer or style click Add.
 Exercise 13: Add styles

