Land Cover/Use Classification using the Semi-Automatic Classification Plugin for QGIS
From AWF-Wiki
(Difference between revisions)
| Line 44: | Line 44: | ||
# Still under {{mitem|text=SCP Dock --> Classification dock --> ROI creation}}, set '''MC_ID''', '''C_ID''', '''MC_info''' and '''C_info''' according to the point attribute (see attribute table), and click on the button {{button|text=Save temporary roi to training input}} [[File:Calculate_sig.PNG]] to record spectral signature. | # Still under {{mitem|text=SCP Dock --> Classification dock --> ROI creation}}, set '''MC_ID''', '''C_ID''', '''MC_info''' and '''C_info''' according to the point attribute (see attribute table), and click on the button {{button|text=Save temporary roi to training input}} [[File:Calculate_sig.PNG]] to record spectral signature. | ||
# On the {{button|text=Working Toolbar}}, increase the '''Dist''' parameter [[File:Dist.PNG]] (e.g. from 0.010000 to 0.100000), and click the button {{button|text=Redo the roi at the same point}} [[File:Redo.PNG]] to capture more of similar pixels. | # On the {{button|text=Working Toolbar}}, increase the '''Dist''' parameter [[File:Dist.PNG]] (e.g. from 0.010000 to 0.100000), and click the button {{button|text=Redo the roi at the same point}} [[File:Redo.PNG]] to capture more of similar pixels. | ||
| − | #Repeat step | + | #Repeat step 6, while adjusting the region growing distance to record several land cover/use ROIs and spectral signatures for all points. |
==Assess Spectral Signatures== | ==Assess Spectral Signatures== | ||
[[Category:QGIS Tutorial]] | [[Category:QGIS Tutorial]] | ||
Revision as of 15:09, 26 November 2017
Contents |
Working steps
Preparing raster data (Converting DN to reflectance)
- Load the multiband raster file Subset_S2A_MSIL2A_20170619T.tif available in the course data. This contains all 13 bands of Sentinel-2 scene.
- Follow Split stack to extract bands 2, 3, 4, 5, 6, 7, 8, 11 and 12, using the multiband raster file Subset_S2A_MSIL2A_20170619T.tif as input layer.
- In the processing toolbar, type Raster calculator into the search field to find the GDAL\OGR --> Raster calculator tool and open it.
- Click the button Run as batch process..., and use Add row
 button to add enough processing rows.
- Click the button ... of Input layer A to select the single extracted bands as input layers (i.e. one per row).

- Enter and repeat the expression A/10000 under Calculation in gdalnumeric syntax using +-/* or any numpy array functions (i.e. logical_and()) and set Output raster type to Float32

- Click the button ... of Calculated to save output file
- Click Run
- Follow Create stack to create a multiband raster file from the converted single bands from step 3 and load into QGIS canvas.
Install and set up SCP plugin
- Click Plugins --> Manage and Install Plugins.
- Type in the search bar semi-Automatic Classification, click on the plugin name and then on Install plugin.

- Right-click on the Plugin Toolbar and make sure the following are checked SCP Dock, SCP Edit Toolbar, SCP Tools and SCP Working Toolbar.

Defining classification inputs in SCP-plugin
We need to define input image, training input and spectral signature files for SCP.
- Open the SCP Dock.
- Click SCP Dock --> SCP input --> Input image, use the button Refresh list
 and the drop-down menu-bar to select the multiband Merge file (i.e. from DN to Reflectance conversion) as input image.
- Click the button Band set
 to further define the input image.
- Next, click Quick wavelength settings and select Sentinel-2 from the list in order to automatically set the Center wavelength for each band and the Wavelength unit (NB. required for spectral signature assessment).
- In the RGB list
 of the Working Toolbar, select 3-2-1 to display natural color composite. Also, type in 5-3-2 to display false color composite. While changing the color composite; also use the buttons cumulative_stretch
  and std_dev_stretch
  for better displaying the Input image (i.e. image stretching).
- We need to define training input file in order to collect ROIs and spectral signatures.
- Click SCP Dock --> SCP input --> Training input, use the button Create a new training input
 to create the training shapefile, click save.


Collection of ROIs and Spectral signatures
- Click on the button Add Vector Layer
 to Load the vector file Training_points_refactored.shp available in the course data and overlay it on the multiband Merge' layer.
- To display attribute labels for Training_points_refactored.shp, right-click to open Properties --> Labels. Select Show labels for this layer and Label with C_ID.
- ROIs can be created by drawing polygons using the button Create a ROI polygon
 or by an automatic region growing algorithm using the button Activate ROI pointer
  . The region growing algorithm can create more homogeneous ROIs (i.e. standard deviation of spectral signature values is low) than manually drawn ones; the manual creation of ROIs can be useful in order to account for the spectral variability of classes. We will use the automatic region growing algorithm.
- From SCP Dock --> Classification dock --> ROI creation, check the function Display NDVI.
- Next, click the button Activate ROI pointer , and notice that the cursor displays NDVI value which changes over the image pixels.
- Still under SCP Dock --> Classification dock --> ROI creation, set MC_ID, C_ID, MC_info and C_info according to the point attribute (see attribute table), and click on the button Save temporary roi to training input
 to record spectral signature.
- On the Working Toolbar, increase the Dist parameter
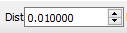 (e.g. from 0.010000 to 0.100000), and click the button Redo the roi at the same point
  to capture more of similar pixels.
- Repeat step 6, while adjusting the region growing distance to record several land cover/use ROIs and spectral signatures for all points.
