Gaussian filter
From AWF-Wiki
(Difference between revisions)
| Line 2: | Line 2: | ||
<math>G_{2D}(x,y,\sigma)=\frac{1}{\sqrt{2 \pi \sigma^2}}e^{-\frac{x^2+y^2}{2\sigma^2}}</math> where <math>\sigma</math> determines the ''width'' of the kernel. | <math>G_{2D}(x,y,\sigma)=\frac{1}{\sqrt{2 \pi \sigma^2}}e^{-\frac{x^2+y^2}{2\sigma^2}}</math> where <math>\sigma</math> determines the ''width'' of the kernel. | ||
== Gaussian filter using OTB == | == Gaussian filter using OTB == | ||
| + | Does currently not work in OTB plugin for QGIS 3.4. Use OTB standalone. | ||
* In the search engine of the Processing Toolbox, type '''Smoothing''' and select '''Smoothing (gaussian)''' under Image Filtering of the Orfeo Toolbox. | * In the search engine of the Processing Toolbox, type '''Smoothing''' and select '''Smoothing (gaussian)''' under Image Filtering of the Orfeo Toolbox. | ||
* Under the Parameters tab, select a '''single band or a multiband file''' as input layer. | * Under the Parameters tab, select a '''single band or a multiband file''' as input layer. | ||
* Select '''gaussian''' from the drop-down list as Smoothing Type. | * Select '''gaussian''' from the drop-down list as Smoothing Type. | ||
* Adjust the '''Radius''' of a circular element in pixel size. | * Adjust the '''Radius''' of a circular element in pixel size. | ||
| − | + | ||
== Gaussian filter using SAGA == | == Gaussian filter using SAGA == | ||
* In the search engine of the Processing Toolbox, type '''Gaussian''' and select '''Gaussian filter''' under Raster Filter of SAGA. | * In the search engine of the Processing Toolbox, type '''Gaussian''' and select '''Gaussian filter''' under Raster Filter of SAGA. | ||
| Line 13: | Line 14: | ||
* Choose '''1''' as Standard deviation | * Choose '''1''' as Standard deviation | ||
* Use the '''3''' pixels as Radius. | * Use the '''3''' pixels as Radius. | ||
| + | [[File:Qgis_saga_gaussian.png|400px]] | ||
{| class="wikitable" | {| class="wikitable" | ||
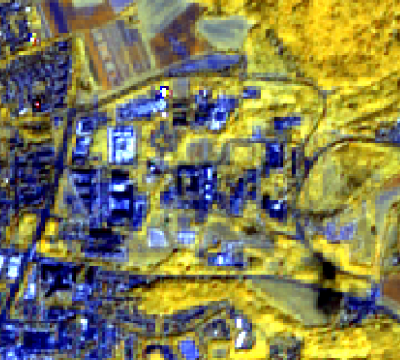
|style="border: 0pt" | [[file:Qgis_campus_pansharp.png|thumb|left|400px|'''Figure A:''' Input image: Sentinel-2 composite (RGB=B7,B6,B5), University Göttingen Campus North]] | |style="border: 0pt" | [[file:Qgis_campus_pansharp.png|thumb|left|400px|'''Figure A:''' Input image: Sentinel-2 composite (RGB=B7,B6,B5), University Göttingen Campus North]] | ||
Revision as of 17:12, 18 November 2018
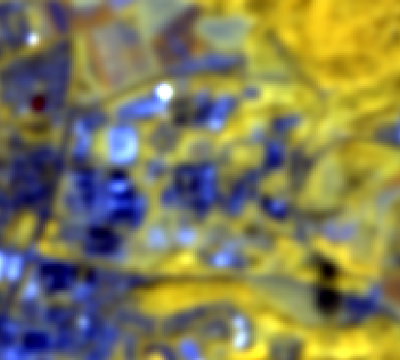
The Gaussian smoothing filter is used for noise reduction and removing details. The filter is similar to the arithmetic mean filter but it uses a different kernel that represents the shape of a 2 dimensional Gaussian distribution which is defined as \(G_{2D}(x,y,\sigma)=\frac{1}{\sqrt{2 \pi \sigma^2}}e^{-\frac{x^2+y^2}{2\sigma^2}}\) where \(\sigma\) determines the width of the kernel.
Gaussian filter using OTB
Does currently not work in OTB plugin for QGIS 3.4. Use OTB standalone.
- In the search engine of the Processing Toolbox, type Smoothing and select Smoothing (gaussian) under Image Filtering of the Orfeo Toolbox.
- Under the Parameters tab, select a single band or a multiband file as input layer.
- Select gaussian from the drop-down list as Smoothing Type.
- Adjust the Radius of a circular element in pixel size.
Gaussian filter using SAGA
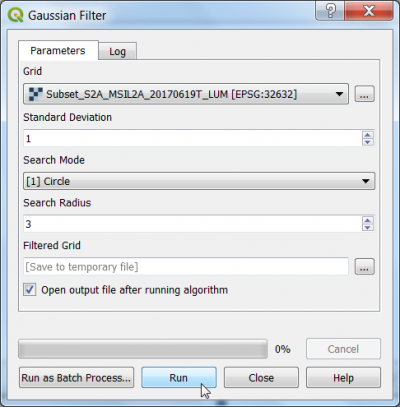
- In the search engine of the Processing Toolbox, type Gaussian and select Gaussian filter under Raster Filter of SAGA.
- Under the Parameters tab, select a single band file as Grid.
- Select Circle from the drop-down list as Search Mode.
- Choose 1 as Standard deviation
- Use the 3 pixels as Radius.


