Create image extent polygon
From AWF-Wiki
(Difference between revisions)
| Line 6: | Line 6: | ||
# Output Vector Data: Choose a new file name with the extension .shp (Shapefile). | # Output Vector Data: Choose a new file name with the extension .shp (Shapefile). | ||
[[File:Qgis_image_envelope.png|400px]] | [[File:Qgis_image_envelope.png|400px]] | ||
| − | + | # Click {{button|text=Run}}. | |
[[Category:Working with Raster Data]] | [[Category:Working with Raster Data]] | ||
Revision as of 15:24, 25 October 2017
- Click the Add raster layer
 and select the file C:/OSGeo4W64/geodata/raster/s2/Subset_S2A_MSIL2A_20170619T.tif.
- After clicking Open, the raster layer appears on the QGIS canvas.
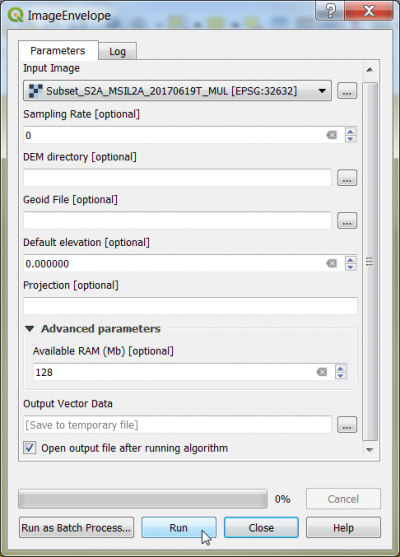
- In the Processing toolbar, type Envelope into the search field to find the OTB --> Geometry --> Image Envelope and open it.
- Specify the input file
- Define the Coordinate Reference System. Type into the Projection text field an ESPG code Id (e.g. 32632). Please check the Raster metadata for the Code id of the raster layer.
- Output Vector Data: Choose a new file name with the extension .shp (Shapefile).
- Click Run.
