Cloud masking
From AWF-Wiki
(Difference between revisions)
(→Refining cloud mask) |
(→Creating cloud shadow mask) |
||
| Line 24: | Line 24: | ||
= Creating cloud shadow mask = | = Creating cloud shadow mask = | ||
| − | + | * Prepare a False color composite of the Sentinel-2 image as background layer in the canvas. | |
| − | + | * Right click on the edited polygon layer in the [[TOC]]. Choose {{button|text= Save as...}}. Fill the form as shown below. | |
[[File:Qgis_vector_saveas.png|400px]] | [[File:Qgis_vector_saveas.png|400px]] | ||
| − | + | * Mark the new created polygon layer in the [[TOC]] and toggle editing [[File:Qgis_vector_edit.png]] of the vector file. Select all polygons using [[File:Qgis_vector_select_all.png|200px]] or press {{button|text=Ctrl + A}}. Activate {{button|text=Move features}} [[File:Qgis_vector_move.png]]. Left click on the canvas and move the cloud polygons that shadows on the background false color composite are completely covered. Save your edits [[File:Qgis_vector_save.png]]and stop editing [[File:Qgis_vector_edit.png]]. | |
| − | + | * Select polygons [[File:Qgis_vector_select.png]] outside the image extent of the false color composite and delete them by pressing {{button|text=Del}} on your keyboard. Save your edits and stop editing [[File:Qgis_vector_edit.png]]. | |
| − | + | ||
= Applying cloud and cloud shadow mask = | = Applying cloud and cloud shadow mask = | ||
Revision as of 15:18, 13 November 2017
Contents |
Sentinel-2 cloud mask
The exclusion of clouds and cloud shadow is an important processing step which is usually done in an early preprocessing stage. The Sentinel-2 products are annotated with Quality Indicators (QI_DATA). In the Level 2A product you may find a file in the folder QI_DATA with the extension _CLD_20m.jp2 (data type: 8bit unsigned integer, spatial resolution 20m) which might be used for masking clouds. The data range is from 0 for high confidence clear sky to 100 for high confidence cloudy (for more details see L2A Product Definition Document).
- Load a multiband Sentinel-2 satellite image (Level 2-A product) Changing Raster Layer Style to display a true color and a false color composite.
- Zoom in to a cloudy part of the image and compare the extent of cloud and cloud shadow in both composites. Which composite is better for displaying clouds?


- The original single band cloud quality indicator band is included in this specifc multiband file as band No. 13. Follow Split stack to extract this band.
- Overlay the QI Cloud band on top of the color composites. Use the Identify Feature Tool for requesting pixel values of the QI band file inside a cloud. Which values represent clouds?
- In (Layer Properties Style load Load the full data range (minimum/maximum values) ). Then change the Style to a Pseudocolor map with interpolation discrete and 10 equal interval classes as shown in the screenshot.
- Double click on a color field of some classes (Layer Properties Style) to open the change color window. Change the opacity from 100% to 0%. Find the best threshold for clouds.


Refining cloud mask
- Create a binary cloud mask (bitmask) where clouds = 1 and non-clouds = 0. Use the Processing tool Orfeo Toolbox --> Miscellaneous --> Band Math. Tick the single band QI layer in the Input Image list list. You may write a conditional ifelse expression using lazy operators. Type into the Expression field: (im1b1>30)?1:0. If pixel values of band 1 of multiband image 1 are larger than 30 then replace with 1 otherwise replace with 0. Mark the output layer in the TOC and click
 to stretch the histogram to view extents.
 ]
]
- Apply a circular majority filter with a radius of 7 pixels. Open the Processing tool SAGA Toolbox --> Raster filter --> Majority filter. The input Grid is the Output image of the band math operation step. Change the Search mode to Circle with an radius of 7 pixels. Mark the Filtered Grid in the TOC and click to stretch the histogram to view extents.

- Open the Processing tool Ordeo Toolboy --> Feature Extraction --> BinaryMorphologicalOperation (dilate). Choose the Filtered Grid as input image. The structuring element type is ball with a radius of 9 pixels. Mark the Feature Output Image in the TOC and click to stretch the histogram to view extents.

- Convert the Feature Output Imge from raster to vector format. Raster --> Conversion --> Polygonize. Select an output file name for vector polygons.

- Change the display of the output vector polygon layer Layer properties --> Style --> Single Symbol --> Simple Fill --> Fill Style from Solid to No Brush. Change the Outline color to bright green and increase the Outline width. As background layer use a False Color Composite of the Sentinel-2 image.
- Toggle editing
 of the resulting vector polygon layer. Activate Select polygons by dragging a box or by single click
  , select all polygons which are misclassified as clouds and delete them by pressing Del on your keyboard. Save your edits
  .
.
Creating cloud shadow mask
- Prepare a False color composite of the Sentinel-2 image as background layer in the canvas.
- Right click on the edited polygon layer in the TOC. Choose Save as.... Fill the form as shown below.

- Mark the new created polygon layer in the TOC and toggle editing of the vector file. Select all polygons using
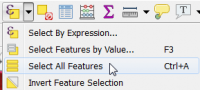 or press Ctrl + A. Activate Move features
  . Left click on the canvas and move the cloud polygons that shadows on the background false color composite are completely covered. Save your edits and stop editing .
- Select polygons outside the image extent of the false color composite and delete them by pressing Del on your keyboard. Save your edits and stop editing .

Applying cloud and cloud shadow mask
- Vector --> Data management tools --> Merge vector layers. as Layer to merge select the cloud and cloud_shadow polygon layers. Run.

- Create a polygon with the extent of the Sentinel-2 image: Create image extent polygon.
- Vector --> Geoprocessing Tools --> Symmetrical difference. Input layers are the image extent and the merged cloud and cloud_shadow polygons.

- Clean the output symmetrical difference vector file with Processing tools Grass GIS 7 --> vector --> v.clean.

- Apply the output vector layer Cleaned as mask to the multiband Sentinel-2 image file. See section Vector polygon masking in Spatial subset.
| |
 |