Split stack
From AWF-Wiki
(Difference between revisions)
(→Using OTB SplitImage) |
(→Using OTB SplitImage) |
||
| Line 2: | Line 2: | ||
# Click the {{button|text=Open Data Source Manager}} [[Image:QGIS_3.0_datasource.png|30px]] and then {{button|text=Add raster layer}} [[Image:QGIS_2.0_addrast.png|20px]] and select the file ''/geodata_w01/mosaic_S2B_MSIL2A_20190724T103029_N0213_R108_T32UNC_UNB_UPC.tif''. | # Click the {{button|text=Open Data Source Manager}} [[Image:QGIS_3.0_datasource.png|30px]] and then {{button|text=Add raster layer}} [[Image:QGIS_2.0_addrast.png|20px]] and select the file ''/geodata_w01/mosaic_S2B_MSIL2A_20190724T103029_N0213_R108_T32UNC_UNB_UPC.tif''. | ||
# In processing toolbox, type {{typed|text=split image}} into the search field to find the {{button|text=OTB --> Image Manipulation --> SplitImage}} tool and open it. | # In processing toolbox, type {{typed|text=split image}} into the search field to find the {{button|text=OTB --> Image Manipulation --> SplitImage}} tool and open it. | ||
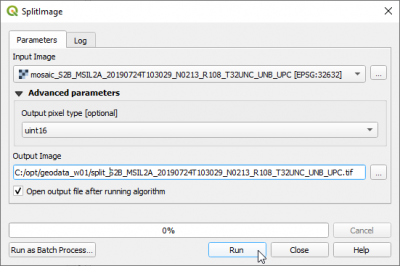
| − | [[File:qgis-otb-splitimage.png| | + | [[File:qgis-otb-splitimage.png|400px]] |
The ''Output pixel type'' is {{typed|text=uint16}}. | The ''Output pixel type'' is {{typed|text=uint16}}. | ||
Revision as of 10:13, 13 May 2020
Using OTB SplitImage
- Click the Open Data Source Manager
 and then Add raster layer
  and select the file /geodata_w01/mosaic_S2B_MSIL2A_20190724T103029_N0213_R108_T32UNC_UNB_UPC.tif.
- In processing toolbox, type split image into the search field to find the OTB --> Image Manipulation --> SplitImage tool and open it.
The Output pixel type is uint16.
Important: choose a physical output file: Save to file. Run in background.
Ignore the error meesage: the resulting single band files need to be loaded manually into the map canvas.
Using GDAL Translate
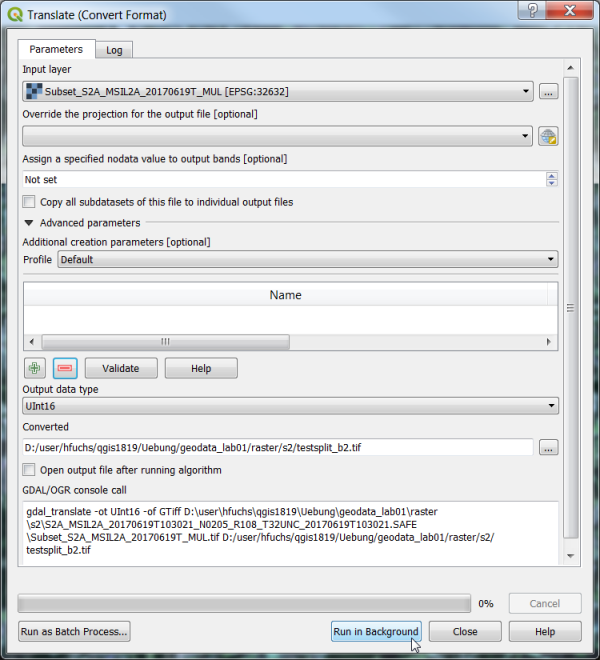
- In the processing toolbar, type Translate into the search field to find the GDAL\OGR --> Translate (Convert format) tool and open it.
- Change the output data format to unsigned 16bit integer): -ot UInt16
- Click the button ... of Converted to select path and name of output file.
- Open the the OSGEO4W Shell. Start --> All Programs --> OSGeo4W --> OSGeo4W Shell
- Copy the content of the GDL/OGR console call and paste it into the OSGeo4W Shell.
- Edit the command in OSGeo4W Shell by adding the option -b 1 to output only the first band.
- Press Enter to execute the command in OSGeo4W Shell.
- Repeat the steps for other bands: change the output file name and edit the -b option accordingly.
- Create a multiband file with a spectral subset of 4 bands. Change the output file name and edit the command in OSGeo4W Shell additional creation options:
- Converted output file:Subset_S2A_MSIL2A_20170619T_B02-
-B03-B04-B08.tif
- Additional creation parameters: -b 2 -b 3 -b 4 -b 8
- Press Enter to execute the command in OSGeo4W Shell.

