Load a WMS-Layer
From AWF-Wiki
(Difference between revisions)
(→Add WMS layer) |
|||
| Line 30: | Line 30: | ||
# Now a list of all downloadable layers appears. | # Now a list of all downloadable layers appears. | ||
# Mark one of the layers and click {{button|text=Add}} | # Mark one of the layers and click {{button|text=Add}} | ||
| − | [[File:qgis_wms_dtk.png| | + | [[File:qgis_wms_dtk.png|800px]] |
==Related articles== | ==Related articles== | ||
Revision as of 07:23, 17 June 2019
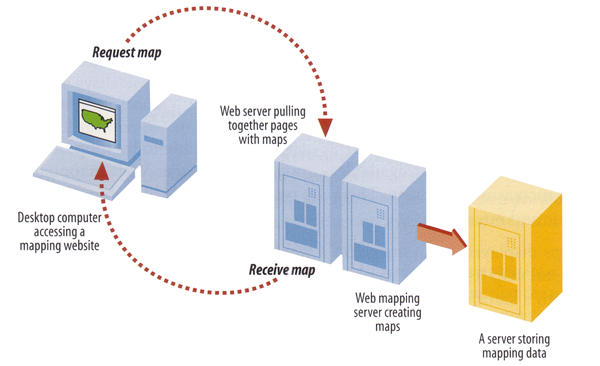
WMS stands for Web Map Service. WMS produces maps of spatially referenced data dynamically from geographic information. These maps are rendered in a pictorial format for example PNG, GIF or JPEG. The operations can be done using a standard web browser which submitt requests in form of a URL. The OGC WMS specification standardizes the way in which maps are requested by clients and the way that servers describe their data holdings.
Contents |
Clients
A growing number of clients supporting WMS or WFS standards.
- ArcGIS
- Quantum GIS
- UDIG
- OpenLayes - pure javascript library for displying map data in most web browsers
Requests
There are differnt types of requests, but only two are required by any wms server:
- GetCapabilities - returns parameters about the WMS and the available layers
- GetMap - with parameters provided, returns a map image
Add WMS layer
If you want to integrate a WMS-Layer to QGIS 3 follow these steps:
- Open Data Source Manager icon

- Click WMS/WMTS.
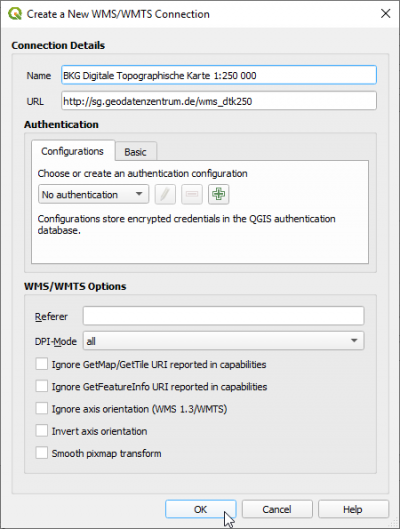
- Type a namme for the new WMS connection e.g. BKG DTK250(Digitale Topographische Karte 1:250,000, Bundesamt für Kartographie and Geodäsie, Frankfurt).
- Type the URL : http://sg.geodatenzentrum.de/wms_dtk250
- Click OK
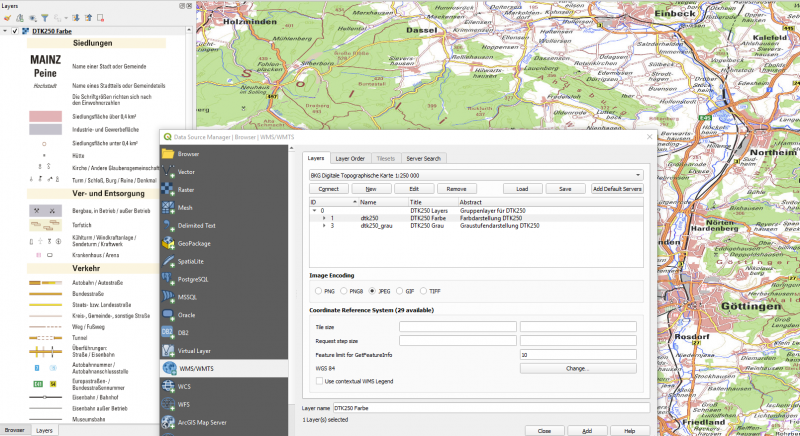
- Click Connect
- Now a list of all downloadable layers appears.
- Mark one of the layers and click Add


