Downloading Sentinel-2 images
From AWF-Wiki
(Difference between revisions)
(→Using the Open Hub) |
(→Using the Open Hub) |
||
| Line 2: | Line 2: | ||
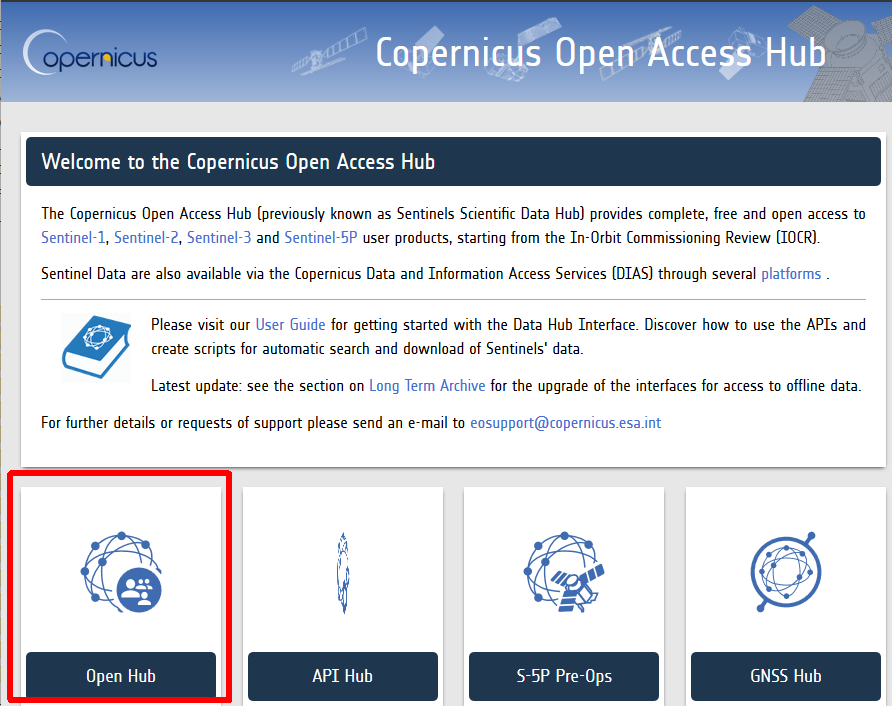
#Visit the [https://scihub.copernicus.eu/ Copernicus Open Access Hub] and click on '''Open Hub'''. | #Visit the [https://scihub.copernicus.eu/ Copernicus Open Access Hub] and click on '''Open Hub'''. | ||
[[File:copernicus_oah.png]] | [[File:copernicus_oah.png]] | ||
| − | # Register for a new account following by clickin on ''' | + | # Register for a new account following by clickin on '''Sign-up''' |
You will receive an e-mail with a link to validate your e-mail address. Following this you can login and start to search for data. | You will receive an e-mail with a link to validate your e-mail address. Following this you can login and start to search for data. | ||
| − | # Activate the '''Pan''' Button on | + | # Activate the '''Pan''' Button on lower left of the Web map. Zoom in to your region of interest using the middle mouse wheel or enable a middle-click with gestures on your touchpad. |
| − | + | # Activate the '''Box''' on lower left of the Web map. Draw a rectangle with left mouse click or activate the '''Box''' on lower left | |
| + | to draw another polygon. | ||
| + | # Open the tab on the upper left of the Web map following the [https://scihub.copernicus.eu/userguide/4AdvancedSearch Advanced Search] instructions. | ||
| + | # Enter the sensing period of interest by entering the "from" and "to" date. | ||
| + | # Activate the checkbox of the Mission: Sentinel-2. You may also choose the data type (Level 1C or Level 2A) and minimum cloud cover. | ||
| + | # Click on Search to display quicklooks of the available satellite scenes. | ||
| + | # Have a closer Look on the quicklooks and download the data. | ||
Revision as of 13:04, 18 October 2017
Using the Open Hub
- Visit the Copernicus Open Access Hub and click on Open Hub.
- Register for a new account following by clickin on Sign-up
You will receive an e-mail with a link to validate your e-mail address. Following this you can login and start to search for data.
- Activate the Pan Button on lower left of the Web map. Zoom in to your region of interest using the middle mouse wheel or enable a middle-click with gestures on your touchpad.
- Activate the Box on lower left of the Web map. Draw a rectangle with left mouse click or activate the Box on lower left
to draw another polygon.
- Open the tab on the upper left of the Web map following the Advanced Search instructions.
- Enter the sensing period of interest by entering the "from" and "to" date.
- Activate the checkbox of the Mission: Sentinel-2. You may also choose the data type (Level 1C or Level 2A) and minimum cloud cover.
- Click on Search to display quicklooks of the available satellite scenes.
- Have a closer Look on the quicklooks and download the data.
