Installation of SNAP
From AWF-Wiki
(Difference between revisions)
| Line 13: | Line 13: | ||
* {{mitem|text=Tools --> Manage External Tools}}. Double click the line '''Sen2Cor 280'''. | * {{mitem|text=Tools --> Manage External Tools}}. Double click the line '''Sen2Cor 280'''. | ||
* Click the Bundled binaries tab. Select the right bundle for your operating system. | * Click the Bundled binaries tab. Select the right bundle for your operating system. | ||
| − | * Download and install | + | * Download and install sen2cor binaries. Restart SNAP Desktop. |
[[Category:SNAP Tutorial]] | [[Category:SNAP Tutorial]] | ||
[[Category:Installation Guide]] | [[Category:Installation Guide]] | ||
Revision as of 17:27, 7 November 2019
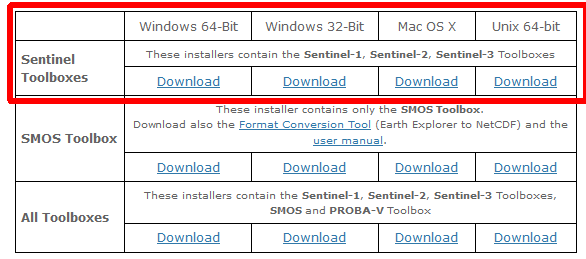
- Download current SNAP Version.
- Choose the correct installer for your Operating System containing Sentinel Toolboxes.
- If running on Windows 10, mark downloaded snap installer in file explorer, right click and run as Administrator.
- Follow the installation wizard and accept all default settings. No need to configure using snap with python (executable), which can be done later if needed.
- Start SNAP Desktop. Install proposed plugin updates.
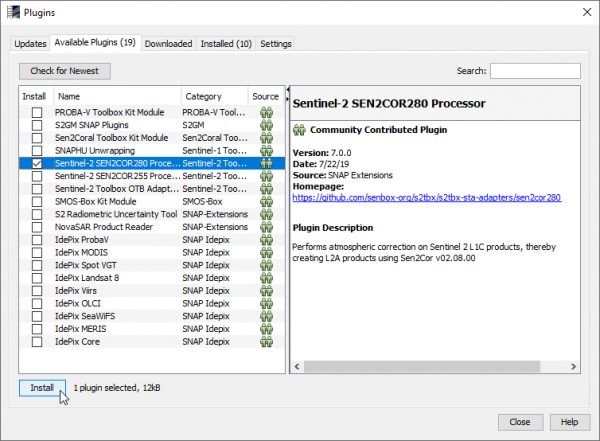
- Install an additional plugin for radimetric calibration of Sentinel-2.
Menu --> Tools --> Plugins --> Available plugins.
- Check Sentinel-2 SEN2COR280 Processor. Click Install. Check Restart now. Finish.
- Tools --> Manage External Tools. Double click the line Sen2Cor 280.
- Click the Bundled binaries tab. Select the right bundle for your operating system.
- Download and install sen2cor binaries. Restart SNAP Desktop.

