Spatial subset
From AWF-Wiki
(Difference between revisions)
(→Interactive box selection) |
|||
| Line 1: | Line 1: | ||
== Interactive box selection == | == Interactive box selection == | ||
| − | # Click the {{button|text=Open Data Source Manager}} [[Image:QGIS_3.0_datasource.png|30px]] and {{button|text=Add raster layer}} [[Image:QGIS_2.0_addrast.png|20px]] and select the file ''/ | + | # Click the {{button|text=Open Data Source Manager}} [[Image:QGIS_3.0_datasource.png|30px]] and {{button|text=Add raster layer}} [[Image:QGIS_2.0_addrast.png|20px]] and select the file ''/geodata_w01/mosaic_S2B_MSIL2A_20190724T103029_N0213_R108_T32UNC_UNB_UPC.tif''. |
# {{mitem|text=Raster --> Extraction ---> Clip Raster by Extent}} | # {{mitem|text=Raster --> Extraction ---> Clip Raster by Extent}} | ||
# Input file (raster): Choose a loaded file from the drop down list or click {{button|text=Select}} to browse for a file. | # Input file (raster): Choose a loaded file from the drop down list or click {{button|text=Select}} to browse for a file. | ||
Revision as of 11:19, 13 May 2020
Interactive box selection
- Click the Open Data Source Manager
 and Add raster layer
  and select the file /geodata_w01/mosaic_S2B_MSIL2A_20190724T103029_N0213_R108_T32UNC_UNB_UPC.tif.
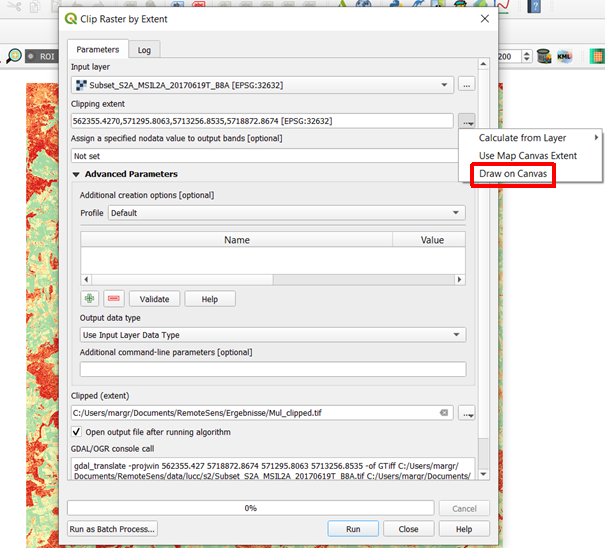
- Raster --> Extraction ---> Clip Raster by Extent
- Input file (raster): Choose a loaded file from the drop down list or click Select to browse for a file.
- Output file: click Select to choose a new file name for the subset image.
- Define the clipping extent by clicking... and Select extent from canvas The clipping mode is now active. Hold a left click on the map canvas dragging a box of your region of interest.
- Adjust the extent coordinates in the text file rounding the coordinates (upper left and lower right).
- Click OK.
Masking by vector polygon
- Load the vector file \geodata\lucc\gadm36_DEU_4.shp. These are the level 4 administrative boundaries of the country Germany downloaded from https://gadm.org/index.html .
- Right click on Layer name in the Layers Panel Properties --> General. Change the Data source encoding from System to UTF-8. Click UTF-8.
- Right click on Layer name in the Layers Panel and open the Attribute table.
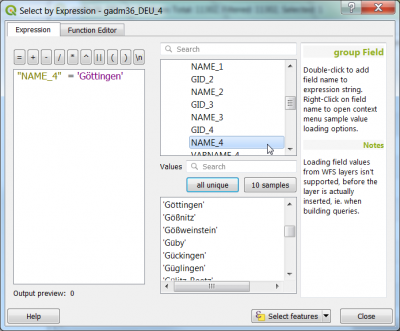
- Click
 and select by the expression: "NAME_4" ='Göttingen'. Select.
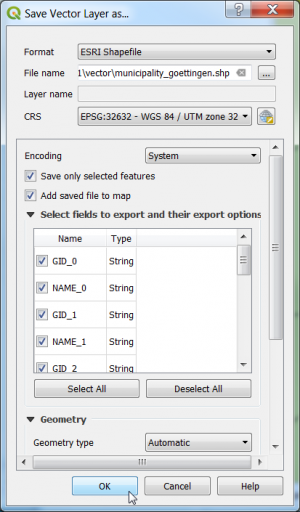
- Right click on Layer name in the Layers Panel . Export --> Save Features as... Save as.... Fill the form as shown below.
- Click the checkbox Save only the selected features.
- The target coordinate reference system (CRS) is WGS84 / UTM zone 32 (EPSG:32632).
Make sure that the CRS is the same like the image file (here WGS84/UTM Zone 32, EPSG:32632)!
- Click OK.
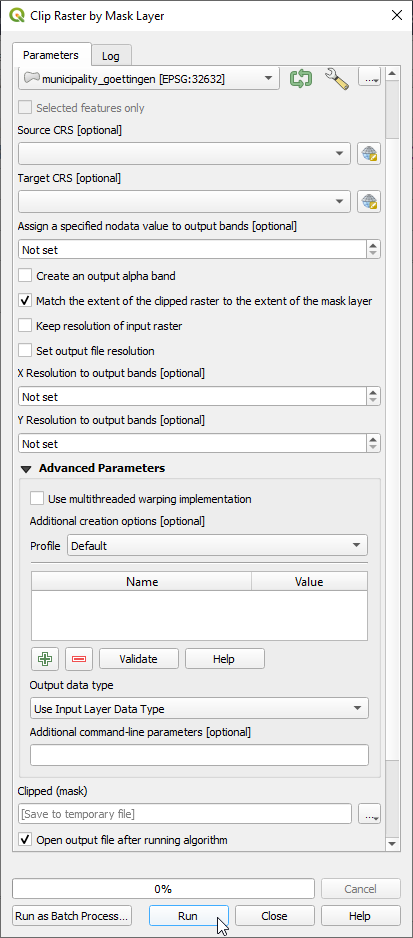
- Raster --> Extraction ---> Clip Raster by Mask Layer...
- Input file (raster): Choose a loaded file name from the drop down list or click Select to browse to a file
- Mask layer: Select the exported vector file (s. above).
- Clipped (mask)): click Select to choose a new file name for the subset image.
- Switch the checkbox on: Crop the extent of the target dataset to the extent of the cutline. All image data outside the polygon will be masked.
- Switch Keep resolution of output raster on.
- Choose output data type: Uint16.
- Click Run in Background.


